Storms in Garden Grove can strike fast, leaving your roof battered and your home vulnerable. When shingles go missing or leaks appear, knowing how to handle an insurance claim can make all the difference. You can protect your home and secure fair coverage by understanding your policy, documenting the damage, and working closely with your insurance company.
You’ll learn how to assess your roof in the first 48 hours, communicate effectively with adjusters, and avoid common claim mistakes that delay repairs. Each step helps you move from damage and uncertainty to a clear plan for restoration.
With guidance from local experts like Tom Byer Roofing Service, you can navigate the claims process confidently and ensure your roof gets the care it needs. This approach saves time, reduces stress, and helps you restore your property with lasting results.
Understanding Roof Damage After a Storm
After a strong storm in Garden Grove, your roof may suffer from wind, rain, hail, or debris damage that affects its structure and appearance. Identifying the extent of the harm early helps you decide whether to file an insurance claim or handle minor repairs yourself.
Common Types of Storm Damage (Wind, Rain, Hail, and Debris)
High winds can lift or tear away shingles, leaving sections of your roof exposed. Missing shingles often lead to leaks and water stains inside your home. Even small gaps can allow moisture to weaken the roof deck over time.
Heavy rain can cause roof storm damage by seeping through cracks or flashing failures. When water enters, it may cause structural damage, mold, or sagging ceilings. You should inspect the attic and ceiling for discoloration or damp insulation after a storm.
Hail damage creates dents, cracks, or granule loss on asphalt shingles. These marks may look minor but can shorten the roof’s lifespan. Fallen debris, such as branches, can puncture shingles or gutters, leading to more severe leaks.
| Storm Element | Typical Roof Impact | What to Look For |
|---|---|---|
| Wind | Missing or curled shingles | Bare spots, lifted edges |
| Rain | Water intrusion | Stains, damp insulation |
| Hail | Dents, cracks | Pitted shingles, granule loss |
| Debris | Punctures, dents | Broken shingles, gutter damage |
Signs You Should File a Claim vs. Simple Repairs
File an insurance claim if you notice widespread or visible damage that affects the roof’s integrity. This includes large areas of missing shingles, hail dents, or leaks causing water stains inside your home. Insurance typically covers sudden storm damage, not wear and tear.
If the issue is small—like a few loose shingles or minor flashing damage—you may handle it as a simple repair. Repairs under your deductible often cost less than filing a claim.
Use a licensed roofing contractor to inspect and document the roof damage. Their report helps you confirm whether the problem is cosmetic or structural. Accurate documentation supports your decision and speeds up the insurance process if you choose to file.
Assessing the Damage: The First 24–48 Hours
In the first two days after a storm, your main goals are to stay safe, record the condition of your roof, and decide if professional help is needed. Acting quickly helps prevent further leaks, mold, or structural problems that can increase repair costs.
Safety Precautions Before Inspection
Check for hazards before going near your roof. Look for downed power lines, loose shingles, or unstable structures that could collapse. Avoid climbing onto the roof if it appears wet, sagging, or damaged by debris.
Wear non-slip shoes, gloves, and a hard hat if you must enter the area. Use a sturdy ladder placed on level ground, and have someone nearby for safety.
If you smell gas, see exposed wiring, or notice heavy structural damage, leave the area immediately and call local emergency services. Your safety should take priority over inspecting or cleaning up.
How to Document Roof Damage (Photos, Videos, Notes)
Accurate documentation supports your insurance claim. Use your phone or camera to take clear photographs and videos from different angles, including close-ups of missing shingles, dents, or leaks. Capture both wide shots of the entire roof and detailed views of specific problem areas.
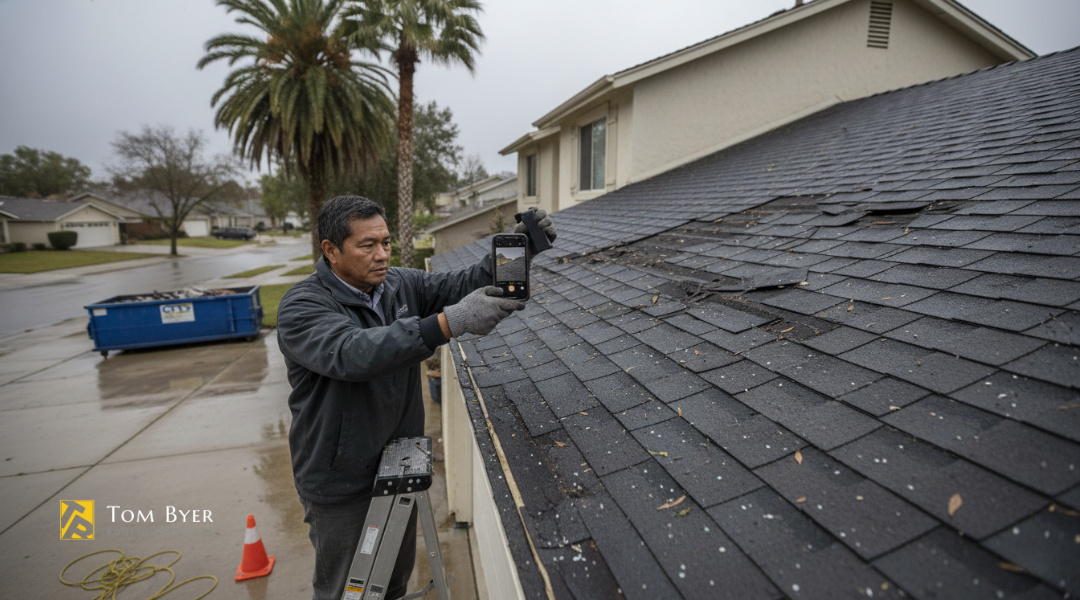
Take pictures of interior damage such as ceiling stains or water drips. Write short notes describing the time, weather, and visible issues. Mark damaged areas on a simple sketch or diagram to help adjusters understand the layout.
Store all files in one folder with clear labels like “north roof slope” or “garage ceiling leak.” This organization helps your insurer and roofing contractor evaluate your claim faster and more accurately.
When to Call a Professional Roofing Contractor
If your inspection reveals major leaks, sagging sections, or exposed decking, contact a licensed roofing contractor in Garden Grove right away. Professionals have the tools to assess hidden damage and perform emergency roof repairs to prevent further water intrusion.
Many contractors offer temporary fixes such as tarping or sealing to protect your home until full repairs can begin. Ask for a written estimate and keep a copy for your claim file.
Avoid hiring unverified workers who go door-to-door after storms. Verify licenses, insurance, and references before allowing anyone to work on your roof.
Contacting Your Insurance Company
When your roof sustains storm damage, contacting your insurance company quickly helps protect your claim and ensures timely repairs. Accurate reporting, understanding your policy details, and avoiding early mistakes can influence how smoothly your roof insurance claim progresses.
What to Report and When
Contact your insurance company as soon as it’s safe after the storm. Most homeowner’s insurance policies require prompt notification—often within a few days. Delays can lead to claim disputes or denial.
When you call, provide specific details such as:
- Date and time of the storm
- Type of damage (missing shingles, leaks, fallen branches)
- Temporary repairs made to prevent further damage
Keep a record of your claim number, the name of the representative, and all communication dates.
If possible, share photos and videos showing the damage before cleanup. Documentation helps the adjuster confirm your report and speeds up the inspection process. Avoid giving repair cost estimates at this stage unless requested; focus on describing the condition of your roof accurately.
Understanding Your Policy: Deductibles and Coverage Limits
Before filing a claim, review your insurance policy to understand your deductible and coverage limits. The deductible is the amount you must pay out of pocket before the insurer covers the rest.
| Policy Type | Description | Payment Example |
|---|---|---|
| Actual Cash Value (ACV) | Pays the depreciated value of your roof | Lower payout, may not cover full replacement |
| Replacement Cost Value (RCV) | Covers the full cost to replace the roof | Higher payout after proof of completed repairs |
Check whether your policy includes wind or hail exclusions, as some insurers require separate coverage for these events.
Knowing your deductible amount helps you decide if filing a claim makes sense. For example, if your deductible is $2,000 and repair costs are $2,200, you might choose to pay out of pocket instead of filing a claim that could affect future premiums.
Common Mistakes Homeowners Make During the First Call
Homeowners often make small errors during the first call that can delay or weaken a claim. One common mistake is admitting fault or guessing the cause of damage. Stick to facts and let the adjuster determine the cause.
Avoid saying the roof was “old” or “needed replacing anyway.” Such statements can lead insurers to classify the issue as wear and tear, which is not covered by most policies.
Do not agree to a settlement or inspection date without reviewing your schedule and confirming your contractor’s availability.
Keep your tone professional and factual. Record the conversation details or request written confirmation of your claim submission. These steps help ensure your roof insurance claim for storm damage in Garden Grove proceeds smoothly and accurately.
Working With Adjusters and Roofing Contractors
When your roof suffers storm damage, the inspection and claim process depends on accurate assessments and clear communication. You need both the insurance adjuster and the roofing contractor to verify the damage, document it correctly, and ensure that repair costs are fairly covered.
The Role of the Insurance Adjuster
An insurance adjuster evaluates your roof damage and determines what your policy covers. The adjuster’s main job is to inspect the property, confirm the cause of damage, and calculate the repair or replacement value.
You should expect the adjuster to:
- Examine both the exterior and interior for leaks or structural issues
- Take photos and notes for the claim report
- Review your policy limits and deductibles
A public adjuster differs from the one assigned by your insurer. Public adjusters work for you, not the insurance company, and can help ensure your claim reflects the full extent of the loss. If you hire one, confirm they are licensed in California and experienced with roof damage claims.
Keep copies of all reports and maintain written communication with your adjuster. This documentation helps prevent misunderstandings about what is or isn’t covered.
Why You Should Have a Roofing Contractor Present During Inspection
Having a roofing contractor present when the adjuster inspects your roof helps ensure that no damage is overlooked. Contractors have technical expertise that many adjusters may not, especially with hidden or subtle storm damage such as lifted shingles or compromised flashing.
A qualified contractor can:
- Point out storm-related wear that might not be visible from the ground
- Provide on-the-spot explanations about repair needs
- Help confirm whether the damage meets policy terms for replacement
This collaboration often results in a more accurate inspection and a fairer claim outcome. Choose a contractor who is licensed, insured, and familiar with insurance claim procedures. Avoid signing contracts that give away your right to choose who repairs your roof.
Comparing the Adjuster’s Report with Your Contractor’s Estimate
Once both reports are complete, review them side by side. The adjuster’s report lists what the insurer will pay, while the contractor’s estimate details the actual repair costs.
Use a simple comparison like this:
| Item | Adjuster’s Estimate | Contractor’s Estimate | Difference |
|---|---|---|---|
| Roof Shingle Replacement | $8,000 | $9,200 | $1,200 |
| Flashing Repair | $400 | $600 | $200 |
If differences appear, ask your adjuster to explain the reasoning. Sometimes, the insurer’s estimate excludes materials or labor costs that your contractor deems necessary.
If you believe the insurance payout is too low, a public insurance adjuster can review both documents and negotiate on your behalf. Keeping communication open among all parties helps ensure your roof is repaired properly and within policy guidelines.
Navigating the Claims Process in Garden Grove
When filing a roof damage insurance claim in Garden Grove, you must follow local permitting rules, track communication with your insurer, and stay organized through each stage of the claim. Careful documentation and timely responses help you secure fair compensation and avoid delays or denials.
Local Permitting and Compliance Considerations
Garden Grove requires building permits for most roof repairs or replacements. Before starting work, check with the City of Garden Grove Building Division to confirm what documentation your contractor must submit. Unpermitted work can delay your roofing insurance claim or void coverage.
Your contractor should follow local building codes, including standards for roofing materials, slope, and drainage. These codes help ensure the repaired roof meets safety and energy requirements.
Keep copies of all permits, inspection reports, and contractor licenses. These documents serve as proof of compliance if your insurer requests verification.
| Document | Purpose |
|---|---|
| Building Permit | Confirms city approval for roof work |
| Contractor License | Verifies legal authorization to perform roofing |
| Final Inspection Report | Confirms work meets local standards |
Submitting these materials with your claim can support faster approval and payment.
Timelines: From Claim Submission to Payment
The insurance claim process typically moves through several steps:
- Damage assessment by you or a roofing contractor
- Claim submission to your insurer
- Inspection by an insurance adjuster
- Settlement offer and payment
In Garden Grove, insurers usually contact you within a few days of filing. The full process can take several weeks, depending on the claim’s complexity and weather-related claim volume.
Keep a communication log noting every call, email, and letter. Record dates, names, and summaries of discussions. This record helps track progress and supports your case if delays occur.
If repairs are urgent, ask your insurer about temporary repair coverage. Save receipts for materials and labor, as these may be reimbursable under your roof insurance claim.
Handling Disputes or Low Settlement Offers
If you believe your settlement is too low, review your policy and the adjuster’s report. Compare their estimate with an independent roofing contractor’s assessment. Differences often arise from overlooked damage or inaccurate measurements.
You can request a reinspection or submit additional documentation, such as photos, invoices, or expert opinions. Be clear and factual in your written response.
For claim denials or underpaid settlements, contact your insurer’s claims department in writing and cite specific policy sections supporting your position.
If the dispute remains unresolved, you may file a complaint with the California Department of Insurance or seek help from a licensed public adjuster. Taking these steps ensures you pursue fair compensation for your roof damage insurance claim.
Preventing Future Claim Issues
You can reduce future insurance problems by maintaining your roof, keeping current records, and working with qualified professionals. These steps help ensure your home stays protected and that your insurance claims process runs smoothly if another storm hits.
Regular Maintenance and Roof Inspections
Performing routine roof maintenance helps you catch small issues before they become major damage. Inspect your roof at least twice a year and after severe weather. Look for missing shingles, cracked flashing, or clogged gutters that can lead to leaks.
Schedule a professional roof inspection every few years. Experienced inspectors can identify early signs of wear that homeowners might miss. Keeping a written record of these inspections provides proof of upkeep if you need to file a claim later.
Create a simple checklist for each inspection:
| Task | Frequency | Notes |
|---|---|---|
| Clean gutters and downspouts | Twice a year | Prevents water buildup |
| Replace damaged shingles | As needed | Avoids leaks |
| Check flashing and vents | Annually | Ensures proper sealing |
Timely repairs and consistent care show your insurer that you’ve taken reasonable steps to maintain your roof.
Keeping Updated Documentation for Easier Claims
Accurate records make future claims faster and easier. Keep dated photos of your roof before and after any maintenance work. Store copies of repair invoices, inspection reports, and contractor estimates in both digital and printed form.
When a storm occurs, you’ll have clear evidence of your roof’s condition before the damage. This documentation supports your claim and helps prevent disputes about pre-existing issues.
Use a simple folder system:
- Photos and videos labeled by date
- Inspection and repair records organized by year
- Insurance correspondence stored separately
Updating these files after every major weather event ensures you’re ready if you ever need to prove your roof’s history.
Partnering with a Trusted Local Roofing Contractor
Working with a licensed local roofing contractor builds long-term reliability. Local professionals understand Garden Grove’s weather patterns and common roofing materials. They can recommend maintenance schedules suited to your home’s age and roof type.
Before hiring, verify credentials and insurance coverage. Ask for references and confirm they have experience handling insurance-related repairs. A reputable contractor can also help you prepare detailed repair estimates that meet insurer requirements.
Building a relationship with a trusted roofer means you’ll have support for inspections, emergency repairs, and claim documentation. This partnership helps protect your investment and minimizes future claim complications.